Showing posts with label Knitting. Show all posts

Monday, June 3, 2013

I-Cord Tops on Baby Hats

Two of my friends are becoming first time grandparents this summer. I picked up some cute yarns on my April shopping spree (a skein of each of these two at 3 Kittens) that said baby girl to me. I pulled them out last week and got to work.

Regia
The Regia hat is from Little England Designs and is called the Fool's Fair Isle Baby Hat. I looked around the internet but didn't find it. It is intended to be knit with one of those nifty fake fair isle yarns, but I used a random stripe skein. The hat is finished with two strips of i-cord. (Decrease until there are 8-12 stitches remaining. With half the stitches, create a 4" I-Cord.  Repeat to create a second tail and tie them together.)

I wasn't thrilled with the hat, but I think a gentle blocking might make a difference.

Panda Cotton

The second hat is out of Crystal Palace Yarns Panda Cotton from a modified free pattern. The pattern was originally written for Crystal Palace Bamboozle (which has now been discontinued). Both yarns are bamboo, cotton and nylon, but the Panda Cotton is 6-7 inches to the inch on a 1-2 and the Bamboozle was a gauge of 4.5 stitches to the inch on a 9.

Two things about this pattern made me willing to adjust and rewrite, the rib is unusual and I liked the pattern the double decreases created. The 'rib' of seed stitch is possible because of the stretch the nylon adds to the yarn.  The decreases at the top of the hat are worked in 4 double decreases.  The pattern is written to be re-sized with the equation 8x + 12.

I made a couple modifications:
  • needle size: 1 for cast on & seed stitch section, a 3 for the stockinette stitch.
  • Change the 12 to 13. (By casting on an odd number, the seed stitch appears seamless.) At the end of the rib section, slip the last stitch as if to knit, (lift the marker off the needle), knit the next stitch, pass the slipped stitch over the knit stitch. (Put the marker back on behind the decreased stitch.)
  • My x=8, so I cast on 77 stitches.
  • I knit 1.25" of seed stitch and 2.5" of stockinette to the start of the decreases; so my hat is a little shorter than the pattern, but mine was also about 12" in circumference
  • Decreases: Instead of round 1 starting with K7, it is actually Kx, which in my case was 8.
I was so happy with the Panda Cotton Hat (and there was about half a skein left), I made a second one!


Thursday, May 9, 2013

Adding a New Skein -- Circular Knitting

If only all yarn came on giant skins with never a knot or imperfection to sully it's grandeur.

However, that is not to be!

When adding a new skein of yarn I am a member of the no knots camp.  (Temporary ones are acceptable at an edge to be seamed, but it should, in my humble opinion  be removed before the seaming.)

If there are to be seamed edges, I always try to add my new yarn at the edge.  When working with a cardigan in one piece or sometimes a shawl or scarf, having a tail to weave at the edge is not ideal.  When working in the round, there are no edges.

This, then is my favorite way to add a new ball of yarn.  It leaves no ends to weave in, no holes, and no tension issues.  It doesn't always work on bulky yarns, but in most cases, I am happy with this method.  It works best in stockinette stitch, but can be adapted for other stitch patterns with a little experimenting.

When there is only enough yarn to knit another 12 to 16 stitches, pick up the new yarn and catch the end, much as you would when working a two color project. (I am using a blue yarn for this demonstration.)

12 to 16 stitches left on old skein
Knit a stitch with the 'old' yarn, catch the new yarn in the next stitch and repeat a couple of times.
This is how it will look from the Wrong Side
Now alternate knitting with the new yarn and the old yarn for 4 to 8 stitches.

Finally repeat the 'catch and knit' sequence with the old and new yarns swapping places and knit forth!

Right Side Wrong Side
Because of the pattern to this cowl (purl & slips every other row), I worked another full row before using the same catching method to take care of the little tails left behind.

Final product (after I removed the blue yarn and redid with the green):

Wrong Side Right Side
Can you tell a new skein was added?

Saturday, April 6, 2013

Adding 2nd Skein - Hawkeye ShiBui

I avoid knitting in ends as much as possible.  When working in the round, it is especially nice to add a new yarn with a 'knitting in' method. (future blog post as I can find no videos or pictorials to explain my method)

But sometimes for the good of the work, that just won't do.  For this infinity scarf, I took that approach.  When there was about 4 inches of black yarn left, I set it aside and picked up the next ball, and continued in pattern.
Infinity Scarf in black and gold, one third complete. Black and gold infinity scarf approximately 3" wide.
Ready for second skein of main color Second Skein of main color added

When my knitting is finished (although with this project, I could do it at anytime) I will go back with my yarn needle and weave in the ends.

As the black yarn doesn't lend itself to tutorials, I didn't try to post pictures of the join, but I still wanted to show my progress on the scarf.


Wednesday, January 23, 2013

HPKY Shawl

Finished this shawl tonight. The usual issue for me: knitting has been done for months, ends just needed to be sewn in.  In my defense, the pattern called for leaving the ends and adding to them to create fringe; as I finished the shawl, I decided I didn't want fringe.

The finished measurements are 15" x 75".

I have this project on ravelry if you want more information.

Sunday, April 15, 2012

Starting a new Project

And no, it doesn't mean I finished an old one.  But I did take an inventory (I was trying to turn up a pair of size 4, 16" circular needles). I am now trying a needle checkout system -- when a pair of circs leave the notebook, a note needs to be place with the project name they are in.  We'll see how it goes!

But I started the Bon Bon Shawl anyway!  It's a kit (which I often have bad luck with -- run out of yarn that kind of thing) but I saw it on the wall at Home Ec Workshop in May 2010, thought about it all summer and sent my credit card number in.

So now, after looking at it and reading and re-reading the instructions for more than a year, I dug in.  I cut and wound yarn for 2 days and am only halfway through all of it.  I wish I had taken a picture of the kit before I started, now it's just a mess of color and string.

Before I cut and wind more, I decided I needed to knit some to see if my cutting and winding technique was a good one.  I think it wasn't, so I am going to knit for a while and see if a better technique appears.

Also, I am digging around looking for splicing techniques:
Braided Splice: The yarn I have is two ply.  After about 1.5 inches, one of the plies I split broke off, so my join area is only 1.5 inches long.  Also, this is pretty time consuming for the number of ends I have.
Spit Splice: This seems slightly faster, but less appealing.  However, this is what I tried for the remainder of my join test.  This video stresses the felting aspect of the procedure.

I'll keep researching!

Saturday, October 8, 2011

Button, Button, Where is the Button?

In a flurry of activity (before the snow flies!) I found some 'lost' projects and sewed on buttons -- 9 buttons to be exact.

First up was the mini wrap from April 2011.  Still disappointed in my yarn selection, I found some nice buttons for it, so let's hope I find a good home for it!


Next up 3 head wraps for my favorite nieces.  They were a very fast knit out of some leftover Brown Sheep Bulky.  And the knitting has been completed for some time.


The flowers are crocheted.  I had only ever done a single chain before, so it took a number of starts (& rips) to get going.  I kept the directions right in front of me the whole time.

The head wrap is a modification of a pattern from T. Matthews and my pattern includes a link to the original.

Monday, April 18, 2011

Misty Alpaca

I started and finished a project in one week.  I think that's a record for me!
Le Petite Echarpe

Referenced in my April 10th post (Misti Alpaca Chunky with a FREE scarf pattern) is finished.  The stitch pattern was fun and produced something rather different. 

I made two adjustments:
  • After the cast-on, I was ready for a wrong side, so I did a row of purl.  If I made this again, I might try a different cast-on, one without the right side/wrong side definition of the long-tail method and one that matches the pattern better.
  • I was ready for the bind off on the purl side instead of the knit side, so I improvised a bit.  I first tried a straight purl bind-off, but because it was looser and wider than the body, it flared.  The instructions had an alternative for the knit side, but not the purl side.  So I did P2tog, *P2tog, pass the previous stitch over* and repeated across.  It was ok, but then I thought the cast on looked bad, so I picked it out, and did a K2tog bind off to match at the cast on edge.  

Sunday, April 10, 2011

Knitting Retreat #15

For the 15th consecutive year, my knitting group enjoyed a great weekend at a B & B with lots of knitting, shopping, and laughing.

Shops this year:
Knitter's Palette
Steven Be
Lila and Claudines
Darn. Knit. {Anyway}
The Yarnery

The first four were all new to me and most of my group.  (The Yarnery is one of our old standbys!)

I spent a little money and added to the stack of patterns I'd like to knit and cupboard full of yarn.  I picked up two different colors of Plymouth Mushishi (but I have three different one skein patterns in mind).

I purchased one skein of Misty Alpaca Chunky with a FREE scarf pattern. I wound that into a ball last night when I couldn't sleep -- it had a knot -- most annoying.

A pink and green Zauberball for fingerless mitts.  I have to rewind and divide it into 2 balls so I can work both mitts at the same time and have my colors go the same direction.  But it is really screaming "Knit ME."  It will probably be on size 1 or 2, while the other yarns are all to be worked on 11 to 13's.

And one book: Viva Poncho.  There are two patterns I liked in it: Eleanor, a raglan poncho with a single cable up the front and back; and Greta with stockinette and reverse stockinette.  Part of what makes that extra funny is that I have an niece Eleanor (Ellie) and a sister Gretta (remember your grade school phonics, long e or short e, my sister's is really the one spelled correctly).

I also carted some works in progress with me.  I didn't finish anything, but I made some good progress on a couple of projects that just need to be wrapped up.  I'm home alone this week, so maybe I will remove something from the UFO pile for good!

Friday, March 25, 2011

Three Needle Bind-Off

My preferred shoulder seam is a Three Needle Bind-Off.  With square shouldered patterns it is very simple.

With shaped shoulders, the pattern is usually written with lots of binding off.  I want to finish my shoulders with live stitches so that I can Three Needle BO.  This can be accomplished with Short Rows.  I have used short rows occasionally, but with very specific instructions.  (Short Rows next time -- it's a lengthy subject!)

Three Needle Bind-Off:
  1. Garment parts should be held so that right sides are together. (The Knitty explanation makes this seem much more complicated than it needs to be.)  Occasionally, for a design feature, instructions will suggest wrong sides together. If you want your seam to the wrong side of the fabric, right sides need to be together. 
  2. K2tog, with 1 stitch from the front needle and 1 st from the back needle.
    Repeat line 1.
    Pass the 1st st (on the right needle) over the 2nd st for the Bind-Off.
    Repeat lines 1-3.
I watched lots of Video to find one I liked to share with you.  I didn't find one that satisfied me, but I picked two that were close to what I wanted.

This video has no audio, but it was short, to the point, and correct.

Three Needle BO video:
There are some suggestions that I don't do. "Hold both yarns together." I have always just used one and when I am finishing, the other yarn gets sewn in like the other ends.  "..Needle same size or smaller."  I wouldn't use a smaller needle.  I have used a larger needle for binding off, but never smaller.  With most bind-off situations, care should be taken to avoid getting too tight. Finally she frets about a loose loop at the edge of the knitting.  I clean that up that bit if needed when I am sewing in my ends.


Sunday, March 20, 2011

Success with Purl Side Decreases

Here are my 'decrease every row' results:

sleeve opening
This is the sleeve opening.


left slope
On the left side you can see the left sloping decreases accomplished with an SSK on the knit side and a SSP tog tbl on the purl side.


right slope


On the right side, the right sloping decrease is a product of K2tog on the knit side and S(pwise)P PSSO.


These are the same decreases I decided to use last week, but after working with them, I gave them new abbreviations.

Using these sets of decreases worked well for me!

Sunday, March 13, 2011

Use SSP2tog tbl and SPP

If you need something that looks like an SSK, use SSPtog tbl.
Slip 1 kwise twice,
return to the left needle,
purl tog tbl (insert right needle into back loop of the second stitch on the left needle from left to right, and then through first stitch on the left needle; purl).

It is complicated, but usually you aren't decreasing across an entire row on the purl side, so I chose it for it's look on the right side of the work.

Need something to look like K2tog? SPP!
Slip 1 purlwise,
Purl the next stitch,
Pass the slipped stitch over.

I got these mixed up 20 times just writing these two posts, but I think the finished line of decreases is worth it.

Saturday, March 12, 2011

Shaping Decreases

This is my quick reference for decreasing. I've read tips about keeping which decrease to use where straight, but they just don't stick in my mind.

Tonight my sweater pattern calls for decreases on EVERY row rather than every other. This means I need decreases for the purl side that will line up and match the ones on the knit side.

My two favorite references for things like this (Montse Stanley's Knitter's Handbook and Vicki Square's The Knitter's Companion) gave conflicting advice. So like any 21st Century knitter, I turned to the internet to cast the deciding vote. Of course I got some more conflicting advice. (A Knitter's Blog and The Knitting Fiend among others.)

On Right Side Right Slant (k2tog)
P2tog: Purl 2 together.
SPP: Slip 1 purlwise, purl the next stitch, PSSO.

On Right Side Left Slant (ssk):
P2tog tbl: insert right needle into back loop of the second stitch on the left needle from left to right, and then through first stitch on the left needle; purl.
*: Slip 1 pwise twice, return to the left needle, p2tog tbl. (no name was assigned to this)
P2tog tbl*: slip 1 kwise twice, return to the left, purl tog through the back loops as above. (Also saw this abbreviated as SSP.)

Many writers discuss the difficulty -- I don't care if it is tight or slow, I want the decrease that best matches the K2tog and SSK! Is that really asking too much?

I guess I will have to do some swatches to see what I like. Results tomorrow!


Saturday, February 26, 2011

Baby Blue for Henry (& Gretta!)

I had quite a bit of yarn left, so I made a hat to match the sweater.

I used the knitter's handy book of Patterns by Ann Budd to give me some direction for a hat size, but it was too big on the first try and so Henry's mother also gets a hat.

After finishing both hats, I think I know where I went wrong. I knit the sweater on a size 10. I don't have a short (or set of dps) in a size 10, so I bumped up to a 10.5 for the hat, but I cast on for the hat as if I was still using the 10.

Today's special reminder: GAUGE IS IMPORTANT.

Wednesday, February 23, 2011

Black Linen/Cotton Sweater

{Original post of this mostly finished sweater was April 2009}

Instead of a crochet neck band, I improvised a pick up bind off edge.

I couldn't make the single crochet look good at all, so I wore it a few times without a finished neck. (no one noticed but me.)

The black yarn doesn't show the stitches very well, but you can see the smoothness of the bind off stitches along the front neck edge.

Pick up a stitch by inserting the needle into the neck edge and creating a knit stitch. Pick up a second stitch, then pass the first stitch over the second as in a standard bind off. Repeat.

The neck now has a more finished edge and is not quite as stretchy. Pretty slick!

[Tahki Yarns Spring/Summer Collection 2004, Tahki Yarns Willow, 12 skeins]

Saturday, February 19, 2011

Five Hour Baby Sweater

(five hours - ha!)


It was a good pattern, top down and quick to knit. I used 2 skeins of Cascade 220 Superwash in Skyline Blue (color 884) on a size 10. I purchased the yarn at Crazy Girl Yarn Shop in Iowa City; they had a nice looking sample done that caught my eye.

I am just not that quick (and I never sit still for a whole five hours at one time to see if I am!) I started the sweater in May 2010, as a 'hope' sweater for my sister. I got scared in June and set it aside. In August, when she announced she was pregnant, I got it back out, but didn't restart until November after the baby was born!

One modification I would like to incorporate -- buttonholes. If and when I make it again, I have a note to add some buttonholes.

I used an afterthought buttonhole from a sweater pattern I made a few years ago. I have never seen instructions for this type of buttonhole anywhere else, and I think it is pretty useful.


Afterthought Buttonholes (Peerie Brocade, Charlie Hada)

With WS facing, insert crochet hook into the strand between sts 2 & 3 (worsted/bulky yarns) [fig.3].
Pull strand until loop is about ½" [fig.4]. Then catch the strand above (marked by arrow) and pull it through loop on hook. Lengthen this second loop and tack it down with a piece of yarn.
Return to the hole you have made and repeat the process in a downward direction.


Try Again

There are two important elements to a blog:
• regular posts
• good material

I have had neither of late.

This is my try, try again.


What is this mess? A pile of UFOs (UnFinished Objects). And shortly after I took the picture, I found another lurking in a closet.

There are two baby sweaters in these bags with the knitting already done. One needs buttons and afterthought button holes, and the other needs the sleeves to be attached and buttons added.
They are the simplest finishes, so I will try to tackle them first. I also have an EZ surprise sweater in a pre-teen size and color, a cardigan for myself, an earband (it doesn't need much either), a scarf I started and ripped out, a lace shawl that has been started and ripped out, and a pair of socks.

Pictures and links to some free patterns to follow!

Monday, August 31, 2009

Finished Objects!

I felted and gave the Kaleidoscope Tote away without taking a picture, but it's done!

I have finished pics of 2 projects:

Poncho (for me)-- Yarn (llama & mohair) from Blackberry Hills in St. Croix Wisconsin; free pattern from Lion Brand that I modified to be top down. This is my second or third time with this pattern: first time as written, with Sandra from Shaeffer Yarns; this time modified again to size 17 needles. (I think it was made with a forgotten yarn in the middle, but that may have been another pattern I converted to top-down) Either way that's getting my money's worth out of a free pattern!


Also in the free pattern mode, the Clapotis Shawl from knitty.com. I made mine from Ty-Dy Socks with a size 7, and plan to give it to my sister for her birthday. (not the one that got the kaleidoscope tote, but the other one). It still needs some blocking, but I have a couple of months before her b-day.

Saturday, June 6, 2009

Kaleidoscope Tote


I really have a love of the felted bag. This is a kit from 3 Kittens. It is made with malabrigo -- a great, really soft wool that I can't wait to use again. However, I ran into a little trouble because I didn't check my gauge.


When I ran short of one of the pinks (Cactus Flower), I checked my gauge and found I was knitting a little loose. (3 Kittens graciously gave me some extra to complete the front & back.) Then when I worked the base (Christmas Green) I was short again, so I changed from 20 stitches to 18 and knit a little tighter. Now of course I have about 3 yds extra of that green.

The final picture shows how things looked when I finally started putting the parts together. One more change I made from the original pattern: when joining the pieces with the Three Needle Bind Off, I held the parts with right sides together to get a nice ridge that will mimic the I-cord finish for the top.

Saturday, April 4, 2009

UFO Weekend 3?

These titles are NOT very creative.

The black sweater is together!!!!!!!! Now it needs a single crochet neck band, ends sewn in, and buttons attached. I need to practice my crochet a bit (I've done very little) and shop for some buttons.

The little sunlight we got today is gone and I really needed it for this sweater. It feels really nice when its on, so it may have been worth the heartache.

During the week I have been working on a pair of socks (about 1 row per night) with 2 socks on 2 circs. There is a little more fiddling than when I work with double points, but the joy in not finishing one and having to turn around and do a second is immense.

The first sweater I made, I was advised to work both sleeves at the same time, and I always try to work this way with pieces that are supposed to match. I will work a front (or two fronts in the case of a cardigan) and the back at the same time. This keeps them the same length and with any shaping I am more likely to keep things matching. Of course when you change your mind about a part of the pattern, it creates more work. (Case in point, the pink shell I am going to work on as soon as this post is done.)

Fantasy Naturale Bag -- picture I promised. -->

I will continue cheering and dancing for a time -- the black sweater is together.

Sunday, March 29, 2009

UFO Weekend 2

The Fantasy Naturale Bag is finished.

I combined a Plymouth pattern I had knit before with a Lion pattern. As I mentioned in an earlier post, I didn't read the pattern well; I was short about 1 skein of yarn. Patternworks to the rescue! I called with the color number and dye lot -- they didn't have it that day, but they would keep an eye out for it. I set the bag aside (at the point pictured) and contemplated ripping a skein out and adding a stripe of solid for the center. Two or three weeks later a bag appeared in my mailbox with one skein in the right dye lot!

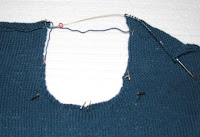
The bag was actually finished last weekend (I'll get a finished pic with the straps soon), and this weekend I am back at the black sweater. The sleeves are now attached to the body and I am starting the side seams and sleeve seams. The sleeve is a set in sleeve, something it turns out I have never done. It is also a stockinette sleeve attaching to garter on the body. Third & fourth part of the difficulty level: a black linen/cotton yarn. The side/sleeve seam is pretty standard and straightforward, I just have to keep plugging away!